Friday, April 6, 2012

project: NSX-R #6

With the rolling chassis and body complete, a quick snap together results in a finished car.


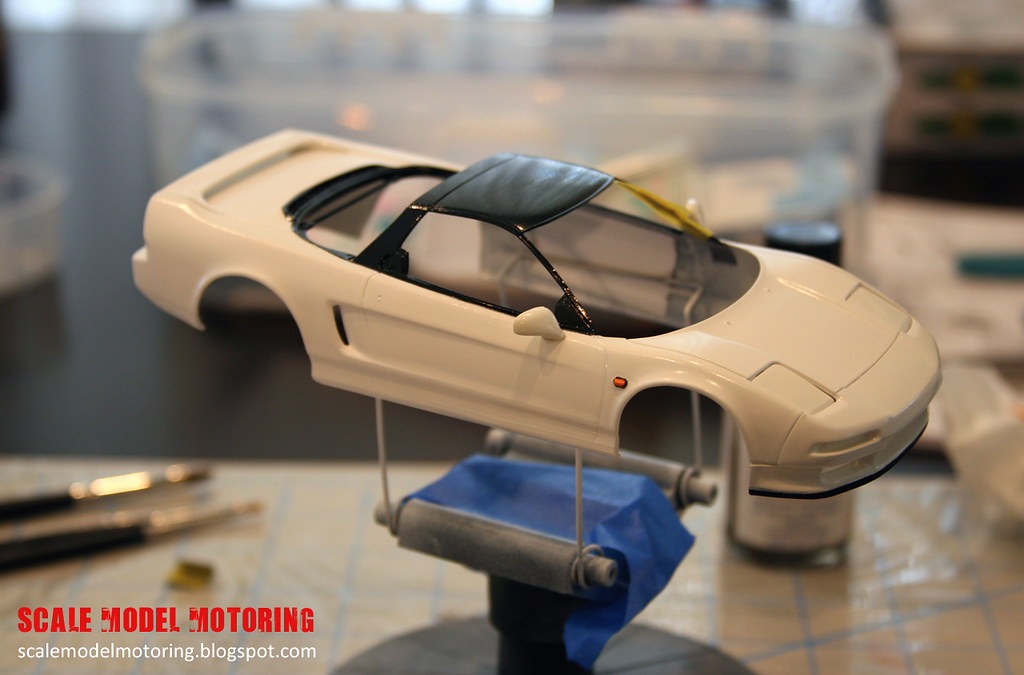
The red tail lights come clear from Tamiya.  I applied clear red acrylic on the inside of the lights.  I also used clear smoke acrylic on the outside of the lights to give it a more authentic darker type-r look.  I opted not to use the photo-etched NSX-R license plate in favor of the Japanese license plate decal.


I applied chrome silver acrylic to the styrene headlight buckets.  Once dry, a glued the headlights onto them.  Must say they turned out pretty realistic looking.  I like how Tamiya allows you to pop the lights up or down even after the kit is built.  A few finishing touches include gluing the front parking lights, windshield wipers, and rear view mirror on.  There is also a water slide decal that can be applied to the top of the windshield to simulate a blue tinted strip.
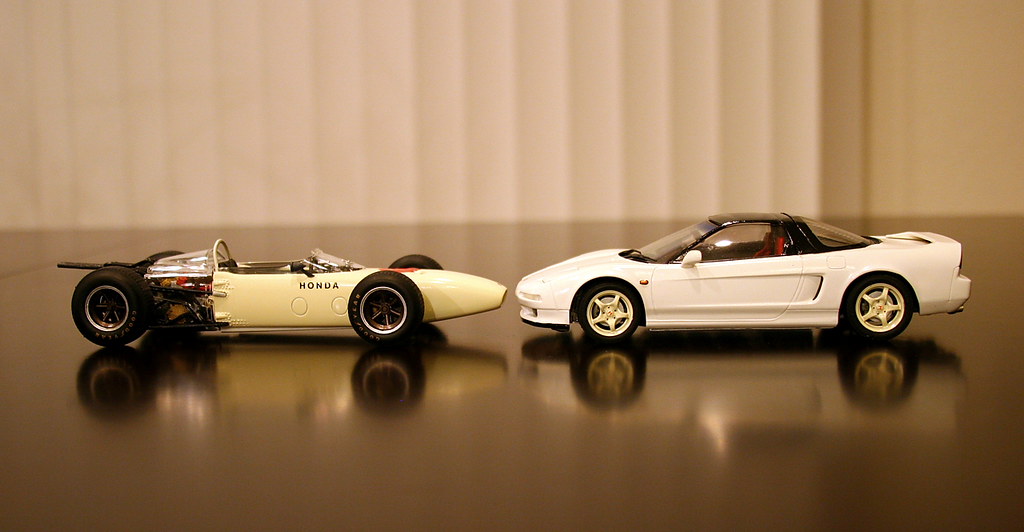

Finally done :)

Friday, March 30, 2012

History: Honda NSR 500

I first discovered grand prix racing in the late 90's during the era that the Repsol Honda squad dominated the 500cc class.  The NSR500 and its variants are undoubtedly the most successful GP bikes of its era spanning 19 years of racing in the premiere class.  Here's a cool video that highlights some of this historic bike's victories and the all time great riders that won titles on it.

Sunday, March 25, 2012

project: NSX-R #5

With the body shell mostly complete, I finished the interior cabin of the car.  Flat red acrylic paint was used on the front of the seats to simulate the fabric Recaro seats. Tamiya flat red acrylic goes on very thin and provides very little coverage.  Some patience is required to get the red applied to the proper finish.  I had to paint the seat 4 times with a few hours of drying time between each coat to get it even & smooth.  Flat black acrylic was used on the back of the seat.  Tamiya calls out for yellow/green to simulate the carbon/kevlar bucket seat, but once installed, you can barely see it (saved a few bucks here).


The interior bucket that houses the dash board and seats was pretty simple to do as it was completely painted with 1 color only (semi-gloss black).


Some glue at the mounting points and we have what looks to be an actual car now. Very rewarding stage of the project!

preview: NSR 500 #4

After about a month off from all things modeling, I'm back to the blog.  The NSR500 project is nearing completion.  A few note worthy techniques I was exposed to during this project was paint weathering & metal foil application.  I'll blog about what I learned in the coming weeks when the NSR project posts begin.

Monday, February 13, 2012

preview: NSR500 #3

A closer look at the swing arm for the NSR500 project.  Besides paint, I used some carbon fiber decal sheeting on the sprocket guard and gold bare metal foil on the shock reservoir.

Sunday, February 12, 2012

preview: Honda NSR500 #2

A bit more progress on the NSR500.  Tried using Model Masters Racing Orange enamel spray for the first time and I must say the stuff is absolute garbage. It sprayed so gritty that I had to sand it off and start over.  I was able to source Tamiya bright orange, which sprayed almost like an air brush out of the can as expected.  Lesson learned.

project: NSX-R #4

Just a quick test fit of the engine cover and photo-etched mesh guard. 2 small drops of super glue are enough to hold the mesh to the plastic.


After making sure, all the pieces fit together well, the body paint and detail is applied.


Careful masking is required around door and window seals.  To clean up the edges after spraying the 2 tone finish on the body, I hand applied some Tamiya acrylic black paint.  It is a perfect color match to to the lacquer black plant, so no issues with mixing the two.